Manage Step
For a Factorial Flow, its constituent Flow Steps can be created and modified within the Flow Canvas The Canvas can be accessed by clicking on any Factorial Flow within the NPO Project, from the Flow tab.
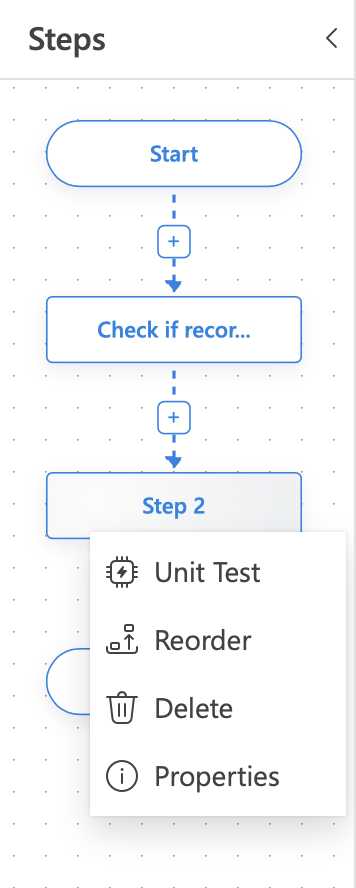
The left-hand side of the canvas shows all the existing steps for the flow in the Steps pane. By default, for a newly created flow, there will be 2 steps already created. A Start step and an End step to which it is connected by a connector arrow. Any subsequent steps added between Start and End form a sequence that follows and order of execution from Start to End
Add a Step to a Flow
The steps below show the typical path for adding a new Flow Step
-
In the
Stepspane inside the Canvas, click on the+button in the sequence of steps where a new step needs to be created.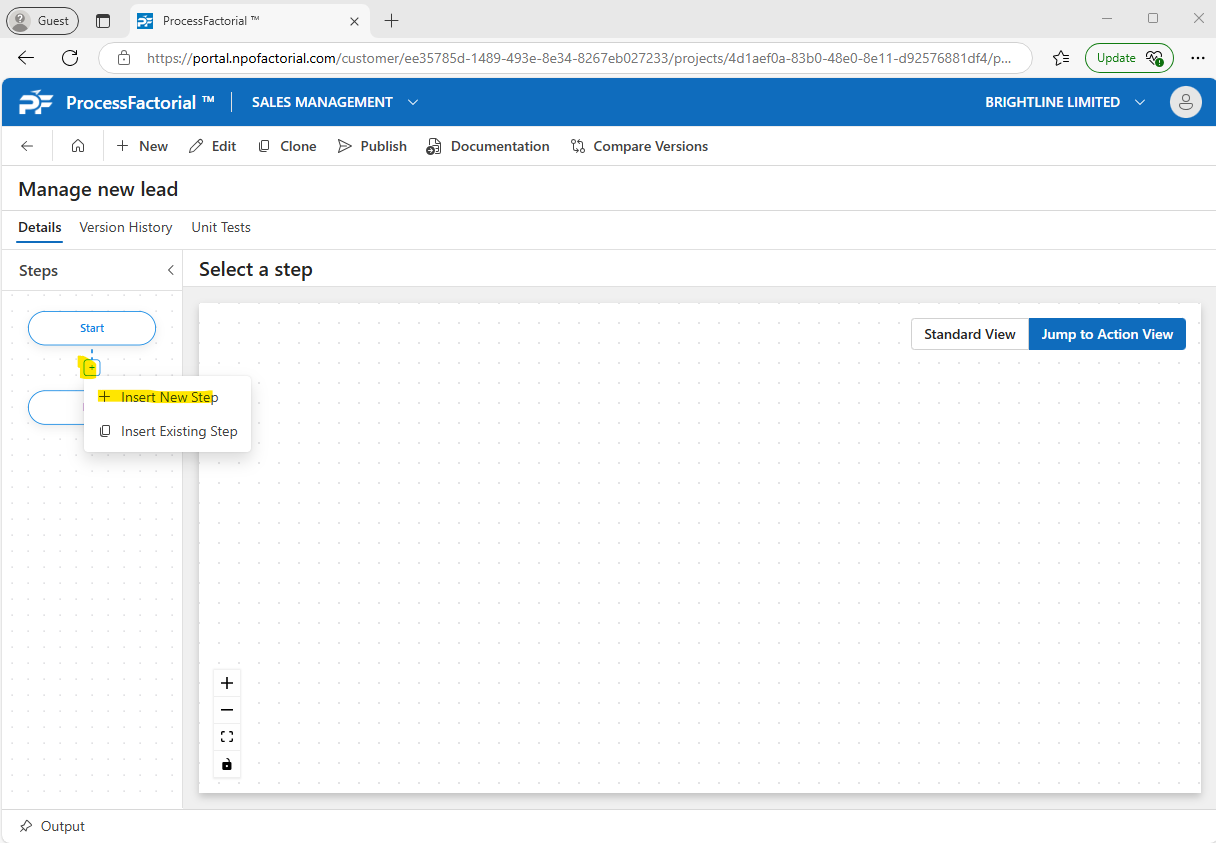
-
In the context menu that opens up, click on
+ Insert New Stepto create a new step. Alternatively click onInsert Existing Stepto clone a step that already exists.
Insert a New Step
-
If you clicked
+ Insert New Step, a drawer panel slides out. Fill in the details indicated in the respective fields described in the table below to create a new step.FIeld Description Name (Required) A suitable name for the step. It is recommended to name it something that alludes to its function Description A suitable description for the step Business Object (Required) The business object associated with the step. Any action defined within the step inherits this as the root business object - Click on Save & Closeto create the new step, or alternatively click onCancelto discard all changes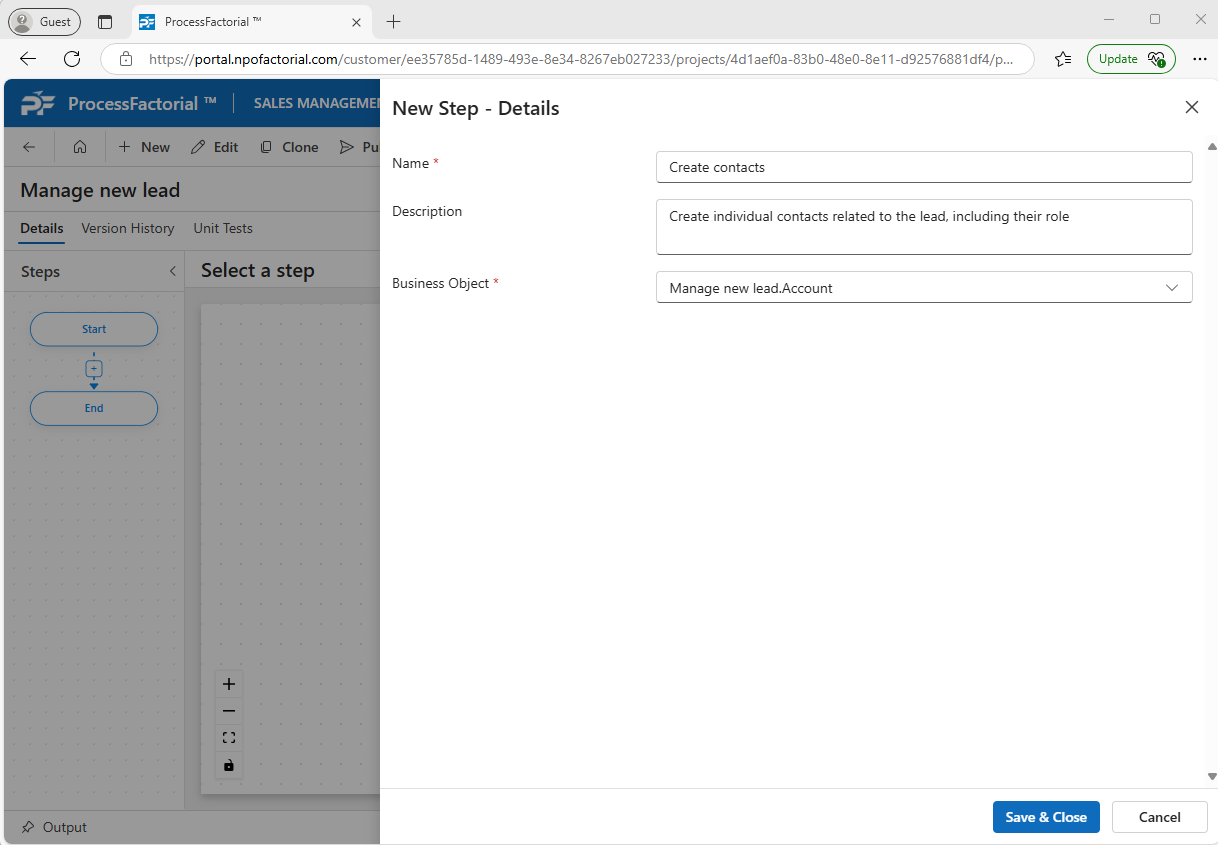
Insert Existing Step
-
If you clicked
Insert Existing Step, a dialog box appears to clone an existing step.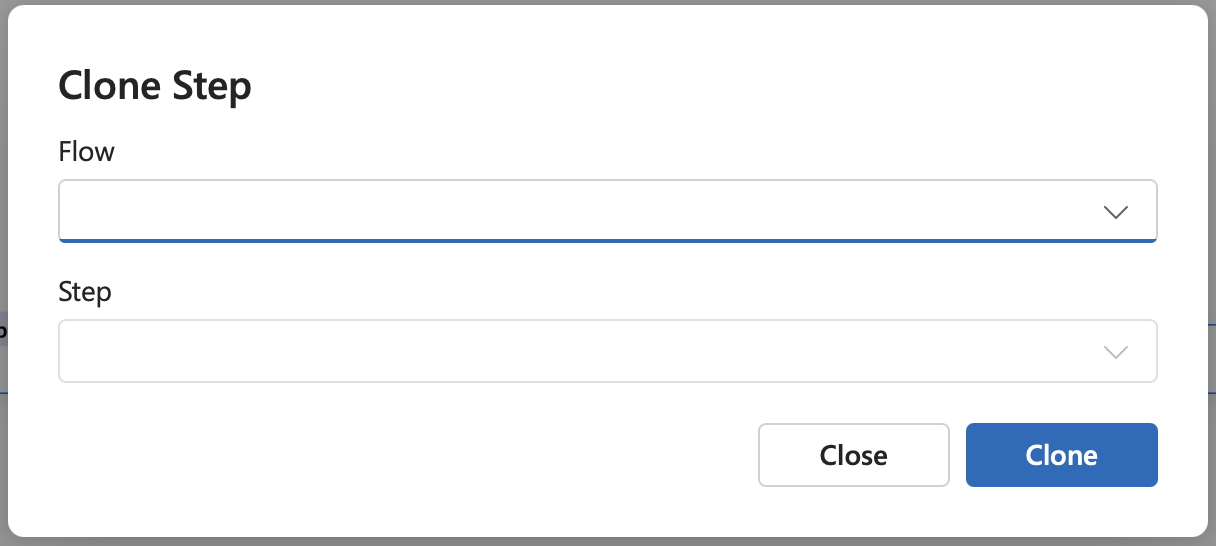
- Select the flow from which the step needs to be cloned in the
Flowdrop down - Select the step that needs to be cloned in the
Stepdropdown. - Click on the
Clonebutton to Insert the cloned step, or alternatively click on theCancelbutton to discard the changes.
- Select the flow from which the step needs to be cloned in the
Modify and Unit Test an existing Step
Right-clicking on an existing step opens up a context menu that allows one to unit test and modify existing steps
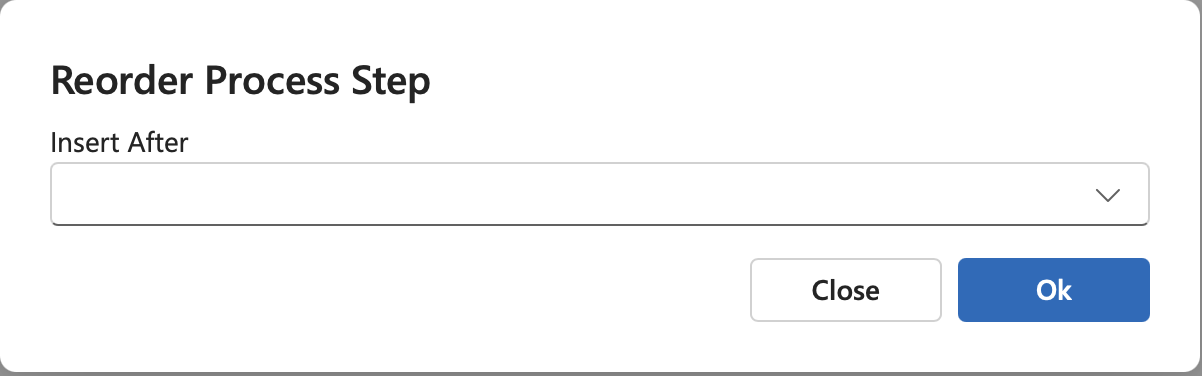
Reorder Flow
Clicking on Reorder opens a dialog box, that allows the user to choose the step after which the current step needs to be inserted.
Edit Step
Clicking on Properties in the context menu opens up the Properties drawer panel. Alternatively one can double click on the step as well. Make necessary changes in the respective fields and click Save & Close to save the changes, or click Cancel to discard any changes.

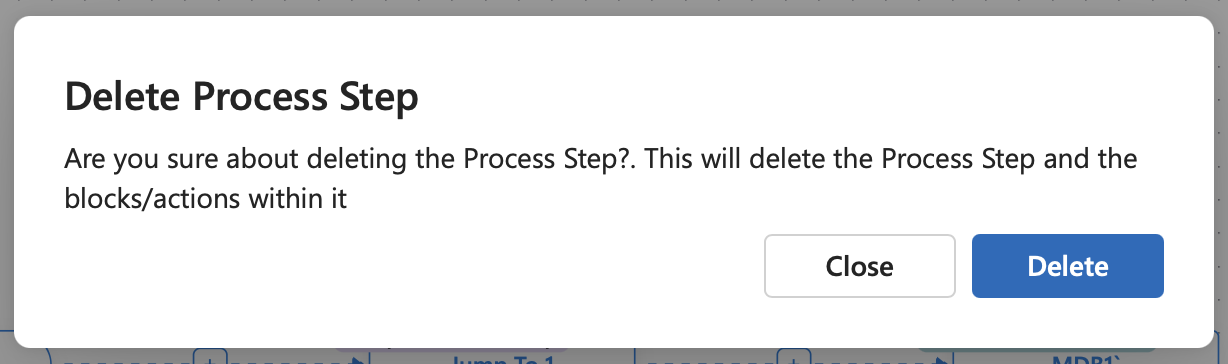
Delete Step
Warning
Deleting a step deletes any Actions created within the step as well.
Clicking on Delete in the context menu opens a dialog box seeking confirmation fro the same. Click on the Delete button to delete the step and any actions/blocks within it. Alternatively, clickClose to close the dialog box without making any changes.
Unit Test
Clicking on Unit test initiates a unit test on the Step. Refer the Unit Test wiki for more details
Previous: Manage Business Event | Next: Manage Actions