Hosted Model Deployment Guide
permalink: customerhosteddeploymentguide
This page outlines all the steps required for deploying the ProcessFactorial as a Customer Hosted Model
Please see Release Cycle for information on release timelines
Methodology
The deployment script consumes 2 JSON files. This allows the customer to make decisions on how the deployment should run. For example, the customer may decide to only include the DataVerse Translation Layer (Translation Layer - Dataverse (npobp_trdataverse)) and not the Translation Layer SQL (npobp_trsql) or Translation Layer SFDC (npobp_trsfdc) Layers
The deployment script will always check whether a component already exists and will only create it if it does not exist, according to the configuration in the JSON files. If the component already exists, it will do nothing. This includes not updating any properties for the component. As a result of this, it is safe to manually modify the Azure components in the Azure Portal to adjust properties or performance tiers.
The scripts need to be run locally on an administrator desktop/VM. See Roadmap#Automated and streamlined deployment for future extensions.
deploymentconfig.json
This file holds all the core deployment parameters. A new version of this file will be included with every new release Do not modify this file.
customerconfig.json
This file holds all the configuration for the customer. This includes: - what ProcessFactorial features to install - naming conventions of Azure components - performance tier of Azure components
Warning
If a component already exists and the customer wants to reuse this component, ensure that the JSON file contains the identifiable information pointing to this resource. For example, reusing a KeyVault that has been manually created, make sure the KeyVault in the JSON has the same name and resource group
This file should be set up once and then reused for every subsequent deployment of a new version of the ProcessFactorial according to our Release Cycle
Prerequisites
Azure Access
The Azure administrator needs access to deploy to Azure Subscription(s) via PowerShell scripts.
Where access needs to be restricted, we recommend that the Resource Group(s) be manually created in Azure and then the Azure user be given elevated access to this these resource groups. The resource group configuration needs to be updated in the #customerconfig.json file to match the manually created resource groups
App Registrations
The deployment will attempt to create an App Registration on the customer Microsoft Entra ID, however, this requires additional elevated Azure permissions.
We recommend that you manually create your App Registration on your Microsoft Entra ID prior to the installation. This removes the requirement of elevated permissions.
Instructions can be found here
Obtain Deployment files
Necessary files to set up deployment will be provided to the customer. The package will contain the following:
1. A yaml file to create deployment pipeline in Azure Dev Ops.
2. A powershell script that orchestrates the deployment.
3. A configuration json file that allows the configurator to choose the required componets to be installed.
4. Readme files detailing pipeline set up.
Modify customerconfig.json
Warning
Do not modify any properties that contain "identifier", for example, "identifier", "appInsightsIdentifier", "azureResourceGroupIdentifier", etc..
Open the JSON file. Find and replace each of the following parameters:
1. PARAM01 - Replace with a name that identifies the [ProcessFactorial](../../../../terminology/processfactorial.md) on your Azure instance, for example "bp001". Max 7 characters.
2. PARAM02 - The Azure Subscription Id that the [ProcessFactorial](../../../../terminology/processfactorial.md) will be installed onto. This is a GUID
3. PARAM03 - The name of the Azure Region that the [ProcessFactorial](../../../../terminology/processfactorial.md) will be installed into. See [here](https://learn.microsoft.com/en-us/dotnet/api/microsoft.azure.documents.locationnames?view=azure-dotnet)
4. PARAM04 - Reporting AAD Client Id. This needs to be provided by us, so please get in touch. Used to call back to NPO servers to do license checks and anonymous usage data
5. PARAM05 - Reporting AAD Client Secret. This needs to be provided by us, so please get in touch. Used to call back to NPO servers to do license checks and anonymous usage data
6. PARAM06 - React App Client Id. This needs to be provided by us, so please get in touch. Used to connect to the React App
There are many parameters that can be updated in this file. Do not update anything unless you understand the impact. If specific features are required and there is no specific documentation on the feature on this page, please get in touch with us for guidance
Other relevant settings - 'otherSettings'.'downloadAdditionalScripts' -> true/false. Specifies whether or not to download the extended deployment scripts. Required if the scripts has not been provided by us yet - 'preRequisites'.'validateEnabled' -> true/false. Whether or not to validate the required PowerShell scripts exist locally and has been loaded.
Deployment
Note
The first run will take a long time to complete, 30 to 60 minutes. This is because it is creating all the Azure components, which takes a long time. Subsequent deployments will mostly validate that components exist and deploy the software binaries and will therefore run much faster
Tip
For additional customer risk mitigation, we recommend that each new wave be installed on a new canary instance first. This is not mandatory, but does alleviate some risk in deployments. This will require a new #customerconfig.json file with distinct component names
- Ensure the #customerconfig.json and maindeploy.ps1 exists in the root folder.
- For pipeline based deployment, ensure that the pipeline is creatued using the accompanying
full-deployment.yamlfile. Also the required azure service connection is to be set up as a pipeline variable. Instructions to do the same are provided in the accompanying readme files. The pipeline runs the maindeploy.ps1 with parameters parsed from the #customerconfig.json file. - For the first deployment, prior to browsing to the portal for the first time, also
- After the first successful deployment, if using VNETs, disable seeddata in the customerconfig.json file.
Post Deployment Smoke Tests
These tests are designed to ensure the components can all talk to each other. The description on how to do these actions are outside the scope of this article, but information can be found in the Usage Guide
Further Instructions
Generally the instructions in the #Deployment section is sufficient. Additional instructions and configuration options can be found on the Hosted Model Deployment Further Instructions page.
Known Issues
The following are known issues in the deployment. They exist due to a variety of reasons, including limitations in the PowerShell script capabilities and security limitations from within a DevOps pipeline. We are continually reassessing these to find resolutions or workarounds.
Linking App Insights (LoggerId) to APIM
Issue
When running the Create APIM (sub_createAPIM) stage on a VM or locally, the script runs as expected. When running it from within a pipeline, the following error occurs when attempting to link APIM with the App Insights. This only happens on creation of APIM, so will only happen during the initial create and will succeed during subsequent runs
Creating diagnostic applicationinsights for APIM YOUR_APIM_RESOURCE
An error occurred:
Error Code: ValidationError
Error Message: One or more fields contain incorrect values:
Request Id: 98c976bd-dca2-435f-94d2-bff0d5668f5c
Error Details:
    [Code= ValidationError, Message= LoggerId must be specified., Target= loggerId]
Our testing indicates that this error is not related to scope, but it is masking another internal error, likely tied to security permissions for the Service Connection to make changes to APIM. We are working on a resolution.
Workaround
- As part of the deployment pipeline execution, a
published artifactis created. Download this artifact locally and extract the zip file. It may be that there is another zip file embedded within the existing zip file. If so, extract that as well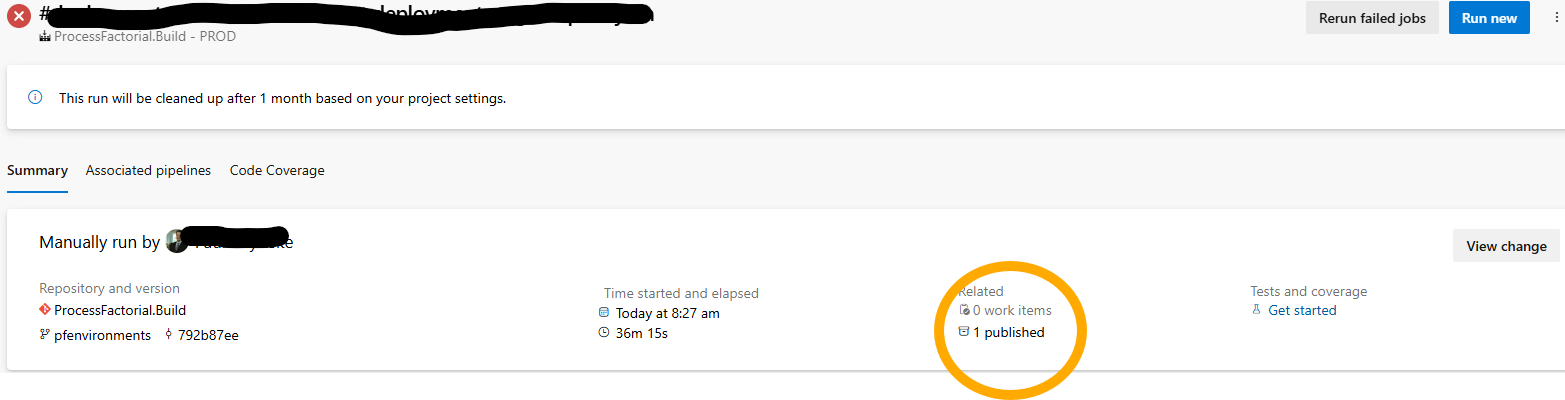
- Open PowerShell and Browse to the folder that looks something like this:

- Run this command:
- This may ask for permission to run, select R for Run Once and let it complete execution. It should only take a few minutes to run.
- Once done, go back to the Pipeline and run it again from the start. It should complete this step successfully now.
Creating Common Function App (servicePlanPython)
Issue
The deployment scripts do not use the Azure CLI (az), it used the Azure PowerShell modules (Az). As of writing this article, the new Flex Consumption Plans for Linux based Function Apps cannot be easily created via the Azure PowerShell libraries yet. Once this as been made available via the PowerShell modules, the pipeline will be updat
Workaround
First disable (enabled = false) deployment of the serverfarm with identifier servicePlanPython and also the function App with identifier npocustomfunctions in the customerconfig.json
The Common Function App needs to be manually created by running the following PowerShell scripts. Get the values from the functionPpps section in the customerconfig.json, look for the npocustomfunctions identifier property.
This needs to be run after the storage accounts have been created via the pipeline.
This can be run from within an Azure Cloud Shell or local PowerShell
$resourceGroupName = "YOUR RESOURCE GROUPNAME"
$appName = "COMMON APP NAME"
$storageAccountName = "PYAPPDATA STORAGE ACCOUNT NAME"
$location = "LOCATION NAME"

az account set --subscription "ID OR NAME OF YOUR SUBSCRIPTION"

az functionapp create --resource-group  $resourceGroupName --name $appName --storage-account $storageAccountName --flexconsumption-location $location --runtime python --runtime-version 3.11 --instance-memory 512 --maximum-instance-count 40 --https-only true
After this script has completed, set the enabled flag back to true for npocustomfunctions, but leave servicePlanPython as disabled as it is no longer used.
Creating APIM Subscriptions
Issue
When running the sub_finaliseAPIM stage on a VM or locally, the script runs as expected. When running it from within a pipeline, the following error occurs when attempting to create Subscription Keys. This only happens on creation of the Subscription Key, so will only happen on initial deployment
Error Code: ValidationError
Error Message: One or more fields contain incorrect values:
Request Id: 3de6a541-2ad3-4eae-ba76-3a34a2dcfe36
Error Details:
[Code= ValidationError, Message= Subscription scope should be one of '/apis', '/apis/{apiId}', '/products/{productId}', Target= scope]
Our testing indicates that this error is not related to scope, but it is masking another internal error, likely tied to security permissions for the Service Connection to make changes to APIM. We are working on a resolution.
Workaround
Option 1: Run the script locally
- As part of the deployment pipeline execution, a
published artifactis created. Download this artifact locally and extract the zip file. It may be that there is another zip file embedded within the existing zip file. If so, extract that as well - Open PowerShell and Browse to the folder that looks something like this:

- Run this command:
-
This may ask for permission to run, select R for Run Once and let it complete execution. It should only take a few minutes to run. Note: Kindly ensure that the required access permissions are met to access the resource group while running the script locally.
-
Once done, go back to the Pipeline and run it again from the start. It should complete this step successfully now.
Option 2: Manually create the Subscription Keys
- During the very first code deploy, let the
sub_finaliseAPIMstep execute and fail. Subsequent steps may also fail. - Manually create the following Subscription Keys against APIM:
| Name | Scope |
|---|---|
| DEMKey | API: apollodemapi |
| DEMTestHarnessKey | API: testharnessapi |
| Portal | API: apolloapi |
- Rerun the code deploy. This time the
sub_finaliseAPIMwill detect that the Subscription Keys already exists and will continue successfully.
404 Not Found
When attempting to access the portal for the first time, it is possible that the portal backend does not have the API_KEY_VALUES and VALID_INPUT_PATHS configured. Follow these instructions on how to configure it
Creating VNETs
Issue
During deployment the pipeline stalls at the Create VNets step with the following error. The error occurs due to the service principal or the user running the deployment not having sufficient privileges to integrate the component (a Function App in this case) to the VNET.
##[error]{"Code":"BadRequest","Message":"The ServiceAssociationLink (SAL) related operation failed with error 'Unable to integrate function app [xx-xxx-xxx-01-common] with subnet [/subscriptions/xxxxxxxx-xxxx-xxxx-xxxx-xxxxxxxxxxxx/resourceGroups/xx-xxx-xx-01/virtualNetworks/xx-xxx-xx-01-vnet/subnets/xx-xxx-xx-01-sn-python] due to error: [Please check if 'Microsoft.App' is registered as a resource provider in your subscription.\r\nYou may check Resource Providers in the Azure Portal or in Azure Cloud Shell as: `Get-AzResourceProvider -ProviderNamespace Microsoft.App`.\r\nYou can register provider in Azure Portal or in Azure Cloud Shell as: `Register-AzResourceProvider -ProviderNamespace Microsoft.App`\r\nFor request GET https://management.azure.com/subscriptions/xxxxxxxx-xxxx-xxxx-xxxx-xxxxxxxxxxxx/resourceGroups/xx-xxx-xx-01/providers/Microsoft.Network/virtualNetworks/xx-xxx-xx-01-vnet?api-version=2022-07-01 with clientRequestId 00000000-0000-0000-0000-000000000000, received a response with status code Forbidden, error code AuthorizationFailed, and response content: {\"error\":{\"code\":\"AuthorizationFailed\",\"message\":\"The client 'xxxxxxxx-xxxx-xxxx-xxxx-xxxxxxxxxxxx' with object id 'xxxxxxxx-xxxx-xxxx-xxxx-xxxxxxxxxxxx' does not have authorization to perform action 'Microsoft.Network/virtualNetworks/read' over scope '/subscriptions/xxxxxxxx-xxxx-xxxx-xxxx-xxxxxxxxxxxx/resourceGroups/xx-xxx-xx-01/providers/Microsoft.Network/virtualNetworks/xx-xxx-xx-01-vnet' or the scope is invalid. If access was recently granted, please refresh your credentials.\"}}]'","Target":null,"Details":[{"Message":"The ServiceAssociationLink (SAL) related operation failed with error 'Unable to integrate function app [xx-xxx-xx-01-common] with subnet [/subscriptions/xxxxxxxx-xxxx-xxxx-xxxx-xxxxxxxxxxxx/resourceGroups/xx-xxx-xx-01/virtualNetworks/xx-xxx-xx-01-vnet/subnets/xx-xxx-xx-01-sn-python] due to error: [Please check if 'Microsoft.App' is registered as a resource provider in your subscription.\r\nYou may check Resource Providers in the Azure Portal or in Azure Cloud Shell as: `Get-AzResourceProvider -ProviderNamespace Microsoft.App`.\r\nYou can register provider in Azure Portal or in Azure Cloud Shell as: `Register-AzResourceProvider -ProviderNamespace Microsoft.App`\r\nFor request GET https://management.azure.com/subscriptions/xxxxxxxx-xxxx-xxxx-xxxx-xxxxxxxxxxxx/resourceGroups/xx-xxx-xx-01/providers/Microsoft.Network/virtualNetworks/xx-xxx-xx-01-vnet?api-version=2022-07-01 with clientRequestId 00000000-0000-0000-0000-000000000000, received a response with status code Forbidden, error code AuthorizationFailed, and response content: {\"error\":{\"code\":\"AuthorizationFailed\",\"message\":\"The client 'xxxxxxxx-xxxx-xxxx-xxxx-xxxxxxxxxxxx' with object id 'xxxxxxxx-xxxx-xxxx-xxxx-xxxxxxxxxxxx' does not have authorization to perform action 'Microsoft.Network/virtualNetworks/read' over scope '/subscriptions/xxxxxxxx-xxxx-xxxx-xxxx-xxxxxxxxxxxx/resourceGroups/xx-xxx-xx-01/providers/Microsoft.Network/virtualNetworks/xx-xxx-xx-01-vnet' or the scope is invalid. If access was recently granted, please refresh your credentials.\"}}]'"},{"Code":"BadRequest"},{"ErrorEntity":{"ExtendedCode":"70006","MessageTemplate":"The ServiceAssociationLink (SAL) related operation failed with error '{0}'","Parameters":["Unable to integrate function app [xx-xxx-xx-01-common] with subnet [/subscriptions/xxxxxxxx-xxxx-xxxx-xxxx-xxxxxxxxxxxx/resourceGroups/xx-xxx-xx-01/virtualNetworks/xx-xxx-xx-01-vnet/subnets/xx-xxx-xx-01-sn-python] due to error: [Please check if 'Microsoft.App' is registered as a resource provider in your subscription.\r\nYou may check Resource Providers in the Azure Portal or in Azure Cloud Shell as: `Get-AzResourceProvider -ProviderNamespace Microsoft.App`.\r\nYou can register provider in Azure Portal or in Azure Cloud Shell as: `Register-AzResourceProvider -ProviderNamespace Microsoft.App`\r\nFor request GET https://management.azure.com/subscriptions/xxxxxxxx-xxxx-xxxx-xxxx-xxxxxxxxxxxx/resourceGroups/xx-xxx-xx-01/providers/Microsoft.Network/virtualNetworks/xx-xxx-xx-01-vnet?api-version=2022-07-01 with clientRequestId 00000000-0000-0000-0000-000000000000, received a response with status code Forbidden, error code AuthorizationFailed, and response content: {\"error\":{\"code\":\"AuthorizationFailed\",\"message\":\"The client 'xxxxxxxx-xxxx-xxxx-xxxx-xxxxxxxxxxxx' with object id 'xxxxxxxx-xxxx-xxxx-xxxx-xxxxxxxxxxxx' does not have authorization to perform action 'Microsoft.Network/virtualNetworks/read' over scope '/subscriptions/xxxxxxxx-xxxx-xxxx-xxxx-xxxxxxxxxxxx/resourceGroups/xx-xxx-xx-01/providers/Microsoft.Network/virtualNetworks/xx-xxx-xx-01-vnet' or the scope is invalid. If access was recently granted, please refresh your credentials.\"}}]"],"Code":"BadRequest","Message":"The ServiceAssociationLink (SAL) related operation failed with error 'Unable to integrate function app [xx-xxx-xx-01-common] with subnet [/subscriptions/xxxxxxxx-xxxx-xxxx-xxxx-xxxxxxxxxxxx/resourceGroups/xx-xxx-xx-01/virtualNetworks/xx-xxx-xx-01-vnet/subnets/xx-xxx-xx-01-sn-python] due to error: [Please check if 'Microsoft.App' is registered as a resource provider in your subscription.\r\nYou may check Resource Providers in the Azure Portal or in Azure Cloud Shell as: `Get-AzResourceProvider -ProviderNamespace Microsoft.App`.\r\nYou can register provider in Azure Portal or in Azure Cloud Shell as: `Register-AzResourceProvider -ProviderNamespace Microsoft.App`\r\nFor request GET https://management.azure.com/subscriptions/xxxxxxxx-xxxx-xxxx-xxxx-xxxxxxxxxxxx/resourceGroups/xx-xxx-xx-01/providers/Microsoft.Network/virtualNetworks/xx-xxx-xx-01-vnet?api-version=2022-07-01 with clientRequestId 00000000-0000-0000-0000-000000000000, received a response with status code Forbidden, error code AuthorizationFailed, and response content: {\"error\":{\"code\":\"AuthorizationFailed\",\"message\":\"The client 'xxxxxxxx-xxxx-xxxx-xxxx-xxxxxxxxxxxx' with object id 'xxxxxxxx-xxxx-xxxx-xxxx-xxxxxxxxxxxx' does not have authorization to perform action 'Microsoft.Network/virtualNetworks/read' over scope '/subscriptions/xxxxxxxx-xxxx-xxxx-xxxx-xxxxxxxxxxxx/resourceGroups/xx-xxx-xx-01/providers/Microsoft.Network/virtualNetworks/xx-xxx-xx-01-vnet' or the scope is invalid. If access was recently granted, please refresh your credentials.\"}}]'"}}],"Innererror":null}
Workaround
To reslove the issue, run the following az cli command locally to assign the role of Network Contributor to the service principal, scoped at a resource group level.
az role assignment create --assignee-object-id <YOUR_OBJECT_ID> --assignee-principal-type ServicePrincipal --role "Network Contributor" --scope "/subscriptions/xxxxxxxx-xxxx-xxxx-xxxx-xxxxxxxxxxxx/resourceGroups/xx-xxx-xx-01/providers/Microsoft.Network/virtualNetworks/xx-xxx-xx-01-vnet"
Troubleshooting
See the Hosted Model Deployment Troubleshooting page