Configure Microsoft Power Pages
This article outlines how to configure your Microsoft Power Pages to use the Factorial Form forms on your Customer Portal
Prerequisites
DataVerse Instance
Microsoft Power Pages requires a Microsoft DataVerse instance to host the portal configuration.
Power Pages Instance
Once Microsoft DataVerse has been spun up, a Microsoft Power Pages instance needs to be installed. If you do not have a Microsoft Power Pages instance installed, follow these instructions.
Power Pages Certificate
In order to use the Microsoft Power Pages auth (oAuth implicit grant) we need to create a certificate. See instructions here
Configuration
Upload Certificate
- Browse to https://aka.ms/ppac
- Under Environments, open your environment setting page.
- In the Resources area, open "Power Pages sites" and open your Site
- In the Security area, click Custom Certificates
- Browse and upload your pfx file and provide the password you used to sign the certificate
- Copy the "Thumbprint" value. This is needed in the next steps.
- Click Ok
Configure Power Pages
- Browse to your Microsoft DataVerse instance. The URL will look something like this: https://yourorgname.crm.dynamics.com/
- Open the "Power Pages Management" App. The App Picker may appear automatically or you need to click on the name of the current app near the top left corner to open the App Picker
- On the left hand menu, select Site Settings under the Website area. Search for the below settings and update them. If they don't exist, create them. For more information, see Use OAuth 2.0 implicit grant flow in your Power Pages site | Microsoft Learn
| Name | Description | Value |
|---|---|---|
| ImplicitGrantFlow/RegisteredClientId | Unique issuer name. This is used to validate the logged in user on the portal | for example:my-test-site |
| CustomCertificates/ImplicitGrantflow | The "Thumbprint" from the certificate above | for example: 33809EE106D638E2BAC7B1829EFAACAB2DAAAAAA |
| ### Configure the ProcessFactorial Portal |
- Browse to the ProcessFactorial Portal
- Browse to your customer and project
- Click on the Environments tab
- Select the environment linked to the Microsoft Power Pages we've been configuring (don't open it, just select the radio button)
- Click the Environment Settings button on the grid.
- Update the settings according to this table:
| Setting Name | Description | Value |
|---|---|---|
| Forms Portal Auth Issuer Key | Public key used to sign the JWT token. Used to validate JWT | The public key extracted from the #Create Certificate earlier. Include the "-----BEGIN PUBLIC KEY-----" and "-----END PUBLIC KEY-----" as well e.g. -----BEGIN PUBLIC KEY----- MIIBIjANBgkqhkiG9w0BAQEFAAOCAQ8AMIIBCgKCAQEAwAaUPF72NnazsE94vAFe AA+7/wY7KxJK9upQwgQQU1BCTSO4GA7UH8uzMMP1FcMAMUMTpMdFHS/J8Q2yYMkl AAJdl9jQ8YctxeJoStL5qse8XhDnM4+fm9MM5oY5zH1LE1CxaQw4kghSjcZ43nlQ AAZubr+qoFEM5QO70WUBSkrTFxR5kMXZ2rwZ0l/g0g4jYeUKsKo2Ert0QDX5Tm1u AAg66MifzQGTRZMkHXnlS1OLyTiysM2G6+jKwinBnBqV/5YSzV/4glt50M/4UIEx AAHI2FKPJtxbPkoC5XTNZWHEc5Xf4hOsHjVWrTMl1wRHm8GTinTeP8pDZ5WeLlSa AAAAAAA -----END PUBLIC KEY----- |
| Enable Forms Portal Auth Issuer Key Validation | Enable or disable issuer signed key validation | True |
| Forms Portal Auth Issuer | Issuer that issued the JWT token. Used to validate JWT | This is typically the base URL of the Power Pages website. You can get this from the Power Pages Management app in Microsoft DataVerse Open the Website record and copy the Primary Domain Name value.e.g. my-test-site.powerappsportals.com |
| Enable Forms Portal Auth Issuer Validation | Enable or disable issuer validation | True |
| Forms Portal Auth Audience | Audience target of the JWT token. Used to validate JWT | The same value as used in #Configure Power Pages above. E.g.my-test-site |
| Enable Forms Portal Auth Audience Validation | Enable or disable audience validation | True |
| Portal Token Algorithm | Authentication algorithm | RS256 |
| 7. Click Save & Close | ||
| ## Appendix |
Install Power Pages
- Browse to https://make.powerpages.microsoft.com/
- In the top left corner, make very sure you select the correct environment. This is the Microsoft DataVerse environment that you want to install the Microsoft Power Pages into
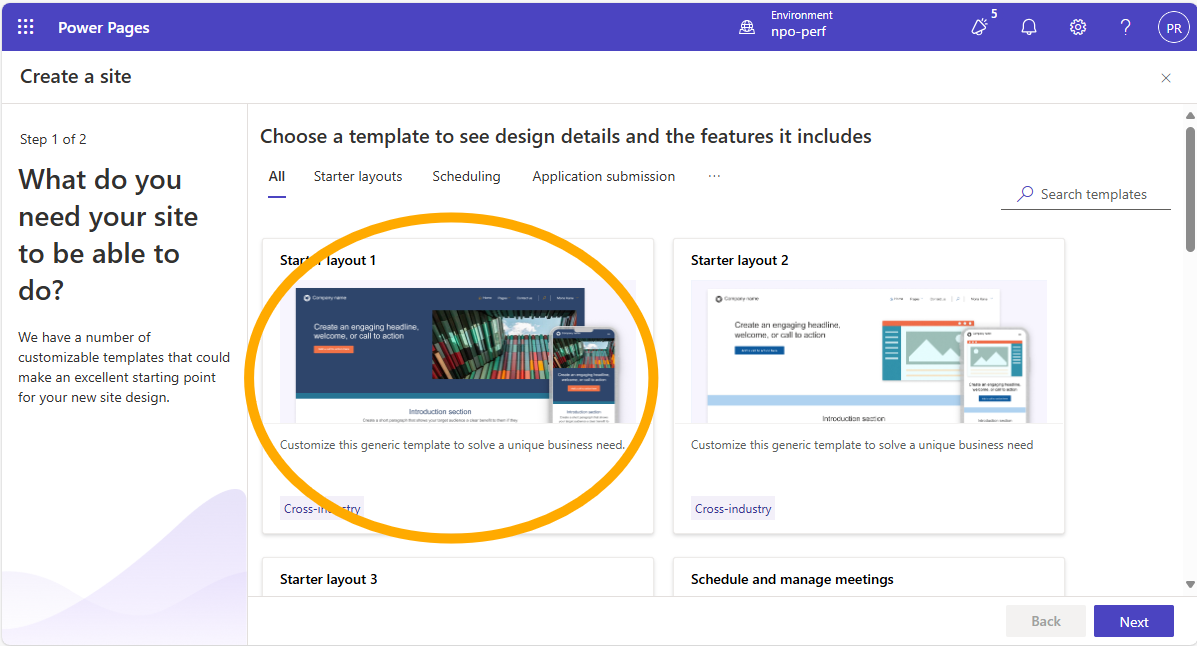
- Chose an appropriate starting point. This example will "Start with a template"

- Chose a template. This example will use the "Started layout 1"
- Give the site a name and web address and click Done
- The process will take a few minutes to complete. Once done, Microsoft will redirect you to the portal editor. This indicates that the portal has been installed successfully.
Create Certificate
There are several methods for creating a certificate for this purpose. The below example is merely one such. This will create a self signed certificate
- Browse to OpenSSL - CrypTool
- Below the console, there is a dropdown. Change this to `Certificates
- Validate all the fields.
- Make sure you ticked the
Output certificate to filebox - Set
period of validity in days. Suggested: 365 - Optionally, tick the
Edit the requester's dataand update the subject of the key - Typically you can leave all the fields as they are.
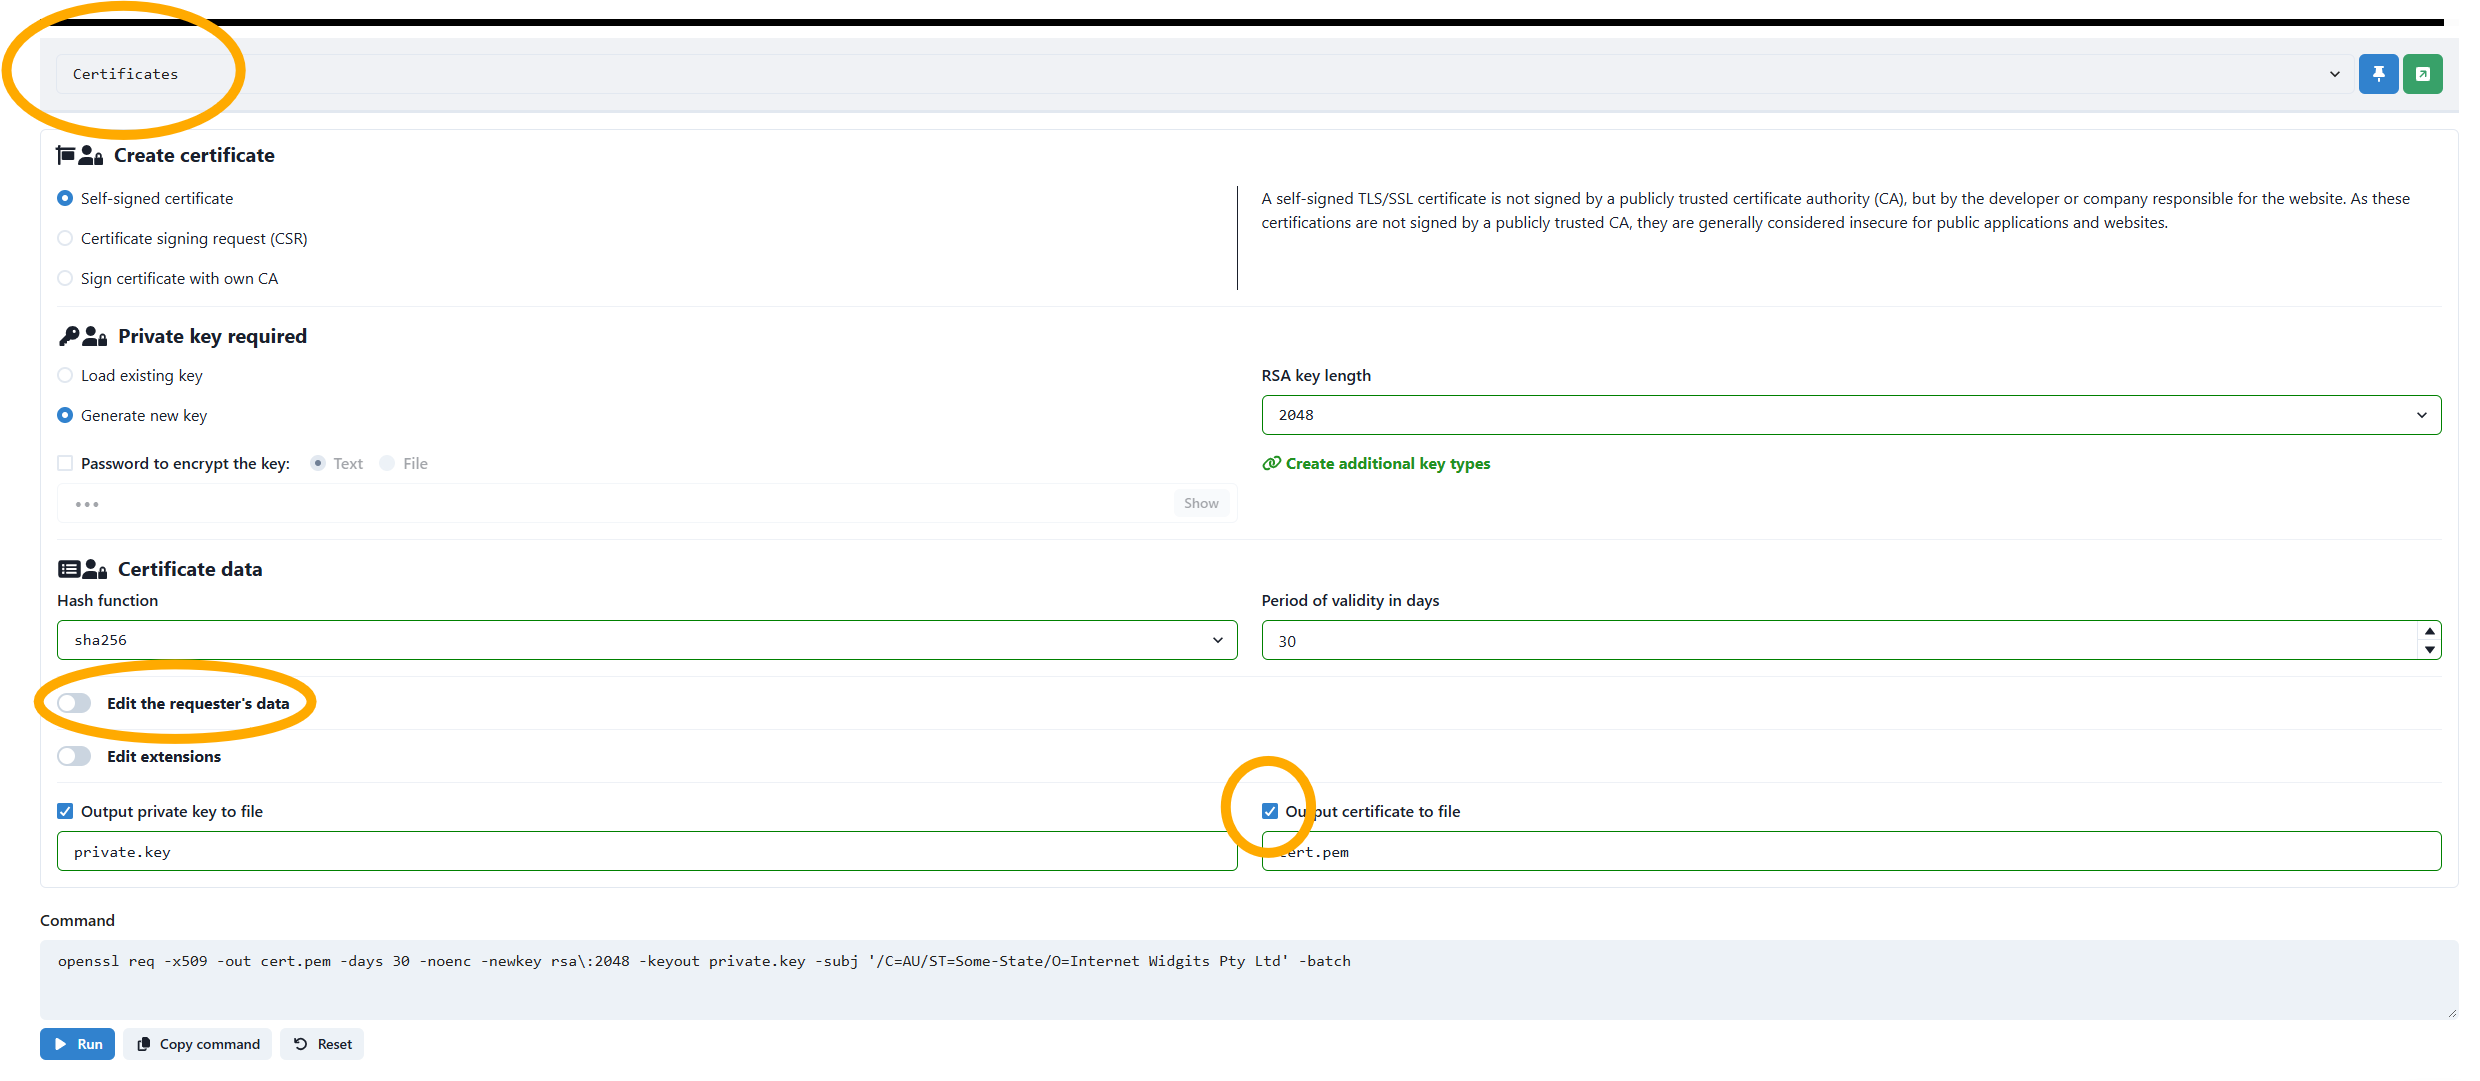
- Make sure you ticked the
- Click Run. This will create the certificate.
- We need to extract the public key from this certificate. Paste this into the console and copy the output
The output will look something like this: -----BEGIN PUBLIC KEY----- MIIBIjANBgkqhkiG9w0BAQEFAAOCAQ8AMIIBCgKCAQEAwAaUPF72NnazsE94vAFe AA+7/wY7KxJK9upQwgQQU1BCTSO4GA7UH8uzMMP1FcMAMUMTpMdFHS/J8Q2yYMZZ AAJdl9jQ8YctxeJoStL5qse8XhDnM4+fm9MM5oY5zH1LE1CxaQw4kghSjcZ43nZZ AAZubr+qoFEM5QO70WUBSkrTFxR5kMXZ2rwZ0l/g0g4jYeUKsKo2Ert0QDX5TmZZ AAg66MifzQGTRZMkHXnlS1OLyTiysM2G6+jKwinBnBqV/5YSzV/4glt50M/4UIZZ AAHI2FKPJtxbPkoC5XTNZWHEc5Xf4hOsHjVWrTMl1wRHm8GTinTeP8pDZ5WeLlZZ AAAAAAA -----END PUBLIC KEY-----
- Now we need to combine the certificates into a pfx file. Execute this command, updating
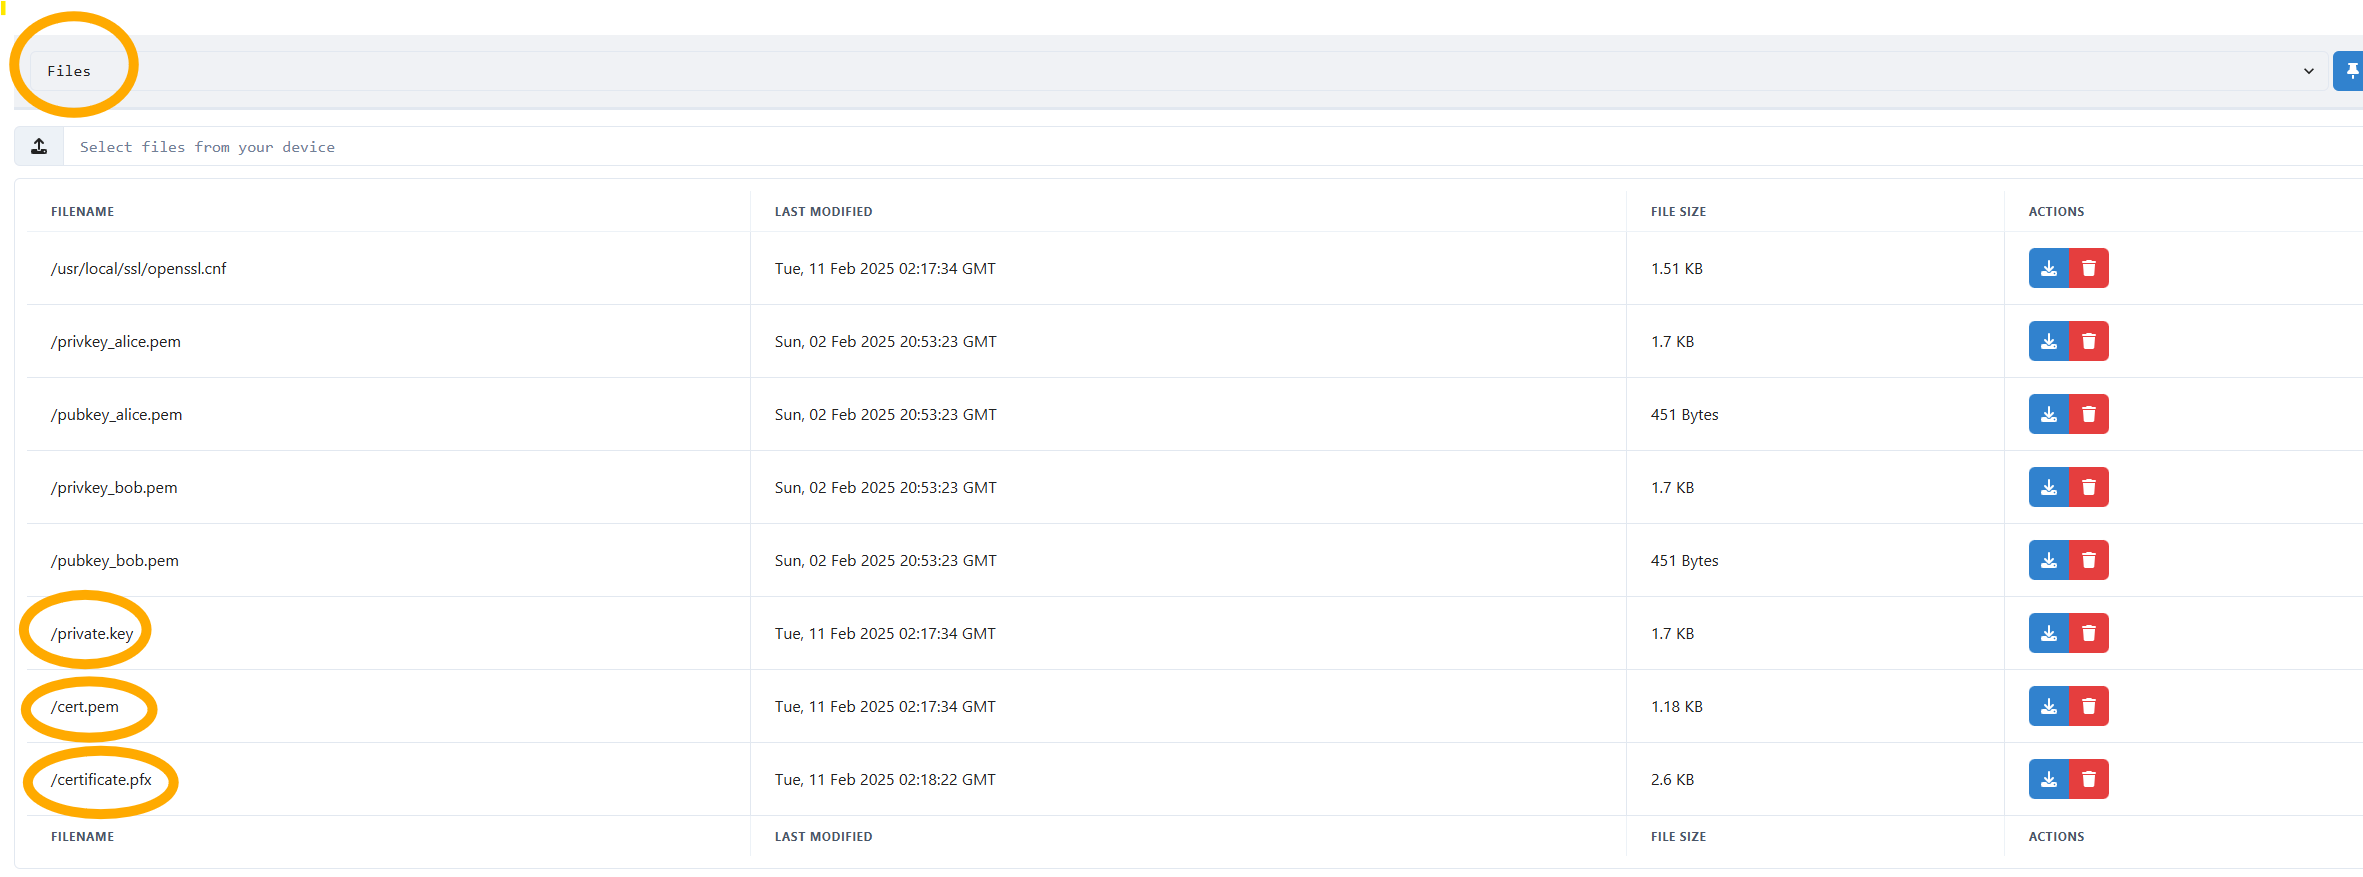
MySecretPasswordwith a password for your certificate: - Change the
Certificatesdropdown toFilesand download the following files:- /private.key
- /cert.pem
- /certificate.pfx